Ready to Work Together?
Let's discuss how our expertise can help transform your business.


 Oct 12, 2020

Rails version 1.0 is approaching its 15 year anniversary, and there’s reason to celebrate the framework's progress.
There have been hundreds of amazing products built with Rails since its creation.
Streaming service heavyweight Hulu, project management leader Basecamp, and hospitality service AirBnB were all built using Rails.
But for every successful project, there’s dozens if not hundreds of others that are overloaded with technical debt, difficult to manage, or a cumbersome nightmare to improve.
As software consultants, we here at NextLink Labs are often tasked with taking over these kinds of legacy Rails apps that have been abandoned by their previous development teams. We’ve been down this road plenty of times before and we understand what a problem they can be for developers.
But we’re also developers ourselves so after dealing with several of these projects, we created a step-by-step guide that we use when starting one of these projects. Here’s our roadmap for successfully taking ownership of a legacy Rails project.
When starting with one of these abandoned Rails projects the first thing we do is try and understand the state of the app, namely the code complexity and the level of technical debt.
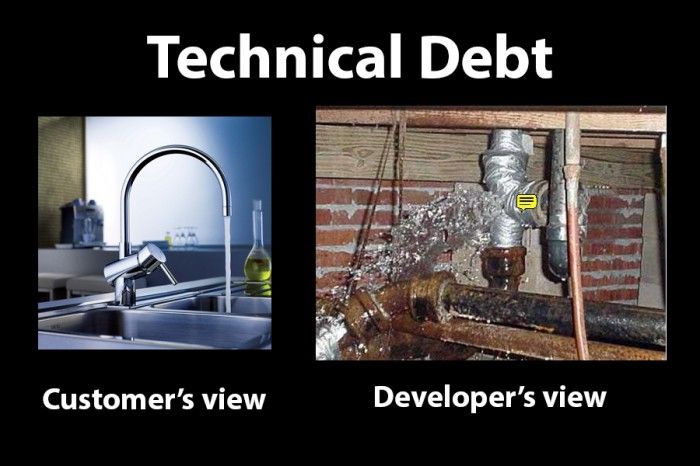
If you’re unfamiliar with the term “technical debt”, it is the result of development teams taking shortcuts to expedite the delivery of a feature or a project. If you’ve ever blown through something “just to get it out the door” and felt somewhat uncomfortable with it, you’ve felt the pang of “technical debt”.
Every project inevitably takes on some amount of technical debt during its lifetime, so taking stock of code complexity and gauging the level of technical debt is a critical first step.
First, scan high and low for any written documentation about the project, whether it be a README, a wiki attached to the git repo, or some other documentation for the project.
Next, check the Gemfile and Gemfile.lock for the number of dependencies and Rails/Ruby versions being used. While doing this, be on the lookout for any gems you aren’t familiar with and make sure to research what they do. We usually write a quick note next to every gem to avoid having to visit rubygems constantly for reminders.
After reading any available documentation, the best starting point for a code review is by looking at the tests in the spec/ or test/ folder.
Tests are the backbone for any Rails project and they are even more important when upgrading or refactoring a project. If the project has no tests or if it has low test coverage, then that'll be the first place we start writing code after finishing the code review. (We’ll cover getting to 100% test coverage later in this post.)
Next, check the config/routes.rb file and the db/schema.rb file.
These files give us an idea of how the data is organized and how the app flows. We make a note inside the schema definition of any "god objects" (i.e. database tables with ~30 or more columns) that could be targets to be divided up down the road.
In the routes file, we make notes of any controllers that have large numbers of custom actions outside of the standard REST actions.
Another aspect of the routes we note is the number of only: or except: modifiers on resources definitions. If we don't see only or except anywhere in the routes file, that most likely means we're dealing with lots of unused routes that we'll want to prune.
After looking in these three areas, we quickly scan the files in the app folder.
If the app has any complexity to it at all, it will be unrealistic to develop a full mental model of the project at this point, so we’re not going to do a line-for-line review of every controller, model, or view.
Instead, we're looking at general code quality, making notes of any giant files of 200 lines or longer, and any other red flags such as activerecord callbacks with lots of implicit behavior, no strong parameters inside controllers, etc.
There are many automated tools that can help with this, and we use the Rails best practices gem often to give us an idea of the overall code quality.
At this point, you should have a decent understanding of the project. You probably won’t have a complete mental picture of the project but you’ve made some progress, so we'll circle back to the tests and the test coverage.
In our experience, a high quality test suite is extremely rare in the realm of inherited projects. In fact, the norm for inheriting projects will most likely involve situations that have no tests at all or at the very best, test coverage between 10% and 20%.
When given a low quality test suite, the first thing to do is just start adding as many tests as possible to get as close to 100% test coverage as you can. This is obviously easier said than done, and we often spend several weeks at this stage; however, without an adequate test suite making any code changes later on will be incredibly dangerous. We don't try to get fancy with our test suite, we write simple unit tests for model and service object methods, add integration tests for every controller route, and typically 5-10 feature tests of the app's core functionality to make sure all the pieces work together.
There's a lot of discussion in the Rails community if 100% test coverage should be a target for a test suite. For this kind of a special case, we do believe that 100% coverage is important because it helps with catching many small edge case bugs when refactoring down the road.
If you need assistance with visualizing test coverage, look into the simplecov gem which creates a nice HTML table to see what code paths your tests are taking.
With the code reviewed and a reliable test suite backing us up, the last thing we review is the deployment process.
In the best case, the README or the client has a step-by-step guide for how to deploy to production and to staging.
Realistically, we don’t live in this world. You’ll rarely encounter intensely documented README files, so the deployment practices you encounter will probably be unclear in most scenarios.
Or there’s nothing and you have no idea. That happens.
Mapping out the deployment process in cases without a lot of direction mostly involves relying on your experience and a healthy dose of guess work. As you record each deployment step, make notes on possible errors that could happen and develop a strategy of how you would revert the step or handle the error. It’ll take a little work.
Want to get some help mapping out the deployment process and get some small amount of reassurance for future production deployment?
Do this: Spin up a free Heroku dyno and push the project up there to check for errors and how the app performs.
With the review phase done, we can now start moving into code changes.
Start off low stakes with some automated linting tools that should cause no behavioral changes to the code, specifically rubocop and prettier. Even with these popular libraries, there's always a chance of bugs which is why we only start making these changes when we're confident in our test coverage.
While there’s some variations, our standard linting process is three steps.
We start by running rubocop --auto-correct which automatically corrects any safe formatting warnings.
Then we use the prettier gem and run rbprettier --write '**/*.rb' to fix other remaining formatting issues, specifically any line length warnings.
Finally, we run rubocop --auto-gen-config which will create a rubocop_todo file to record all remaining rubocop warnings which we can begin fixing right away or later on.
Having this rubocop_todo.yml file will make sure we're not introducing new formatting errors when we make other changes in later steps.
As a side note, at NextLink Labs, we're big fans of using the git blame command when trying to understand what's happening with specific code sections, and having large formatting changes like the ones generated by rubocop and prettier can make git blame less useful.
However, git has an ignore-rev flag for ignoring exactly these kinds of commits, and we recommend adding formatting commits to a .git-blame-ignore-revs file and following a guide like this to automatically ignore these commits.
As we noted above, the formatting changes we made in the previous section should (theoretically) not affect behavior at all, so we can take this opportunity to test our deployment process.
The first production deploy is by far the most dangerous step of the entire process, but we eventually have to take it, so we try and get it out of the way now.
If the project has no staging environment, now’s the time to set one up. It’s important to have a staging environment that mirrors how the production environment is deployed.
For example, if the project uses capistrano for production deploys, spin up a new AWS server and test a capistrano deploy to that endpoint. You should always test reverting for different possible errors on this staging server and test to make sure the website itself is working correctly after it's launched.
At the end of the day, there's only so much to prepare for your first push to production, so always aim for a low traffic time, and then pull the trigger with all hands on deck in case of emergency.
Once our first deployment to production has gone smoothly, we begin with the (potentially) breaking changes.
This can take different forms depending on the project. In some cases, you’ll have product owners that will ask for upgrades to a specific Rails version or Ruby version. In other cases, clients leave it up to your best judgement.
Upgrading both Ruby and Rails versions are entire blog posts in and of themselves, but to offer a bit of direction, just take it one minor version at a time and rely on your tests for guidance if something breaks.
Since Rails 5.0, there have been significantly less breaking changes, but upgrading even a minor version between Rails 3.0 and Rails 5.0 can require major code changes, so slow and steady is the key to avoid introducing new bugs.
With our target Rails, Ruby, and gem versions safely deployed to production, you’ll have finished the foundational work. Well done.
Depending on your client, this may be the end of the project -- all that’s required is an upgrade to their gem versions. Most of the time though, there's a list of features to go along with the changes.
With these 6 steps finished, you’re now in a much better position to start this feature development. Happy development!
 Custom Software Development
One account becomes five, and eventually nobody knows which guardrails are where. Here's how NextLink Labs manages AWS Organizations, OU hierarchies, and Service Control Policies with Terraform and GitLab CI.
Colin Soleim
·
Apr 22, 2026
 Custom Software Development
A backdoored Axios package. A poisoned LiteLLM release. Both live for hours. A dependency cooldown would have blocked them both. Here's how to protect your Rails app with gem.coop, Dependabot, and Bundler checksums.
Colin Soleim
·
Apr 6, 2026
 Custom Software Development
Large Rails monoliths burn millions of tokens per AI session. These 5 architectural changes cut costs and boost AI suggestion quality by 3-4x.
Colin Soleim
·
Feb 19, 2026
.png) Custom Software Development
Custom Software Development
How to Setup Ruby's YJIT Compiler in Your Rails Application
Colin Soleim
·
Mar 28, 2024